All-in-One Guide: Add and Customize Content Blocks in Squarespace
Blocks are customizable content elements you can add to your Squarespace site to create engaging pages. Here's how to use them effectively:
Adding Blocks
To add a block in Version 7.1:
- Open Pages panel and select a page
- Click Edit
- Hover over desired section
- Click Add Block
- Select or search for block type
To add a block in Version 7.0:
- Open Pages panel
- Select page to edit
- Hover over target area and click Edit
- Click + to open blocks menu
- Choose desired block
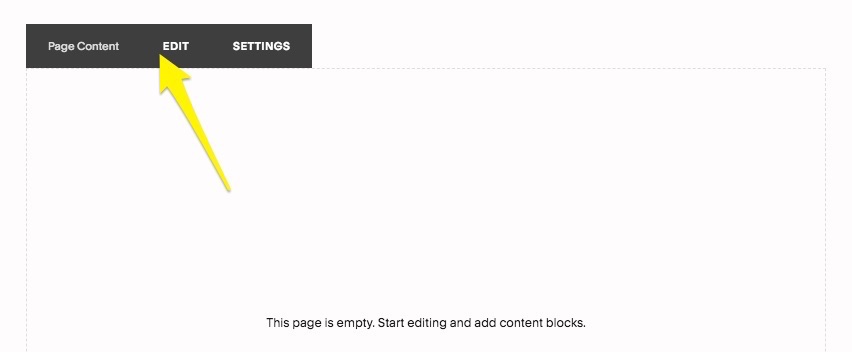
Yellow arrow indicates Edit menu
Where You Can Add Blocks:
- Block sections
- Posts
- Event descriptions
- Footers
- Layout pages
- Additional product information
- Headers and footers (7.0)
- Sidebars (7.0)
Areas That Don't Support Blocks:
- Sections with automatic layouts
- Collection Page sections
- Gallery sections
- Site headers (7.1)
- Album/blog/event/gallery pages (7.0)
- Store pages (7.0)
Popular Block Types:
- Text: Add formatted text content
- Image: Display photos in various layouts
- Gallery: Create image/video collections
- Button: Add call-to-action buttons
- Form: Collect visitor information
- Video: Embed external videos
- Newsletter: Add signup forms
- Product: Display store items
- Social Links: Add social media icons
Editing Blocks:
- Click Edit on the page
- Select block
- Click pencil icon or double-click block
- Make desired changes in block editor
Tips for Success:
- Use clear insertion points to position blocks
- Drag and drop to reposition blocks
- Clear browser cache if + buttons don't appear
- Check block compatibility with your template
- Consider Premium features for advanced blocks
Mobile Editing:
- Limited block functionality in Squarespace app
- Basic text/image editing supported
- Major changes require desktop access
Related Articles
7 Reasons Why WordPress and SEO Services Are Essential for Your Online Success