
How to Add Mail eXchanger (MX) Records to Configure Google Workspace Email
Mail eXchanger (MX) records are essential for sending and receiving emails with Google Workspace. Here's how to add and manage them correctly.
Automatic vs. Manual Setup
MX records are typically added automatically when setting up Google Workspace with your Squarespace domain. If you're experiencing email issues, missing or incorrect MX records might be the cause.
Checking Existing MX Records
- Access your Domains dashboard
- Select your Squarespace domain
- Click DNS
- Look for Google Workspace DNS records
You should see either:
- Five separate Google Workspace records
- One consolidated Google Workspace record
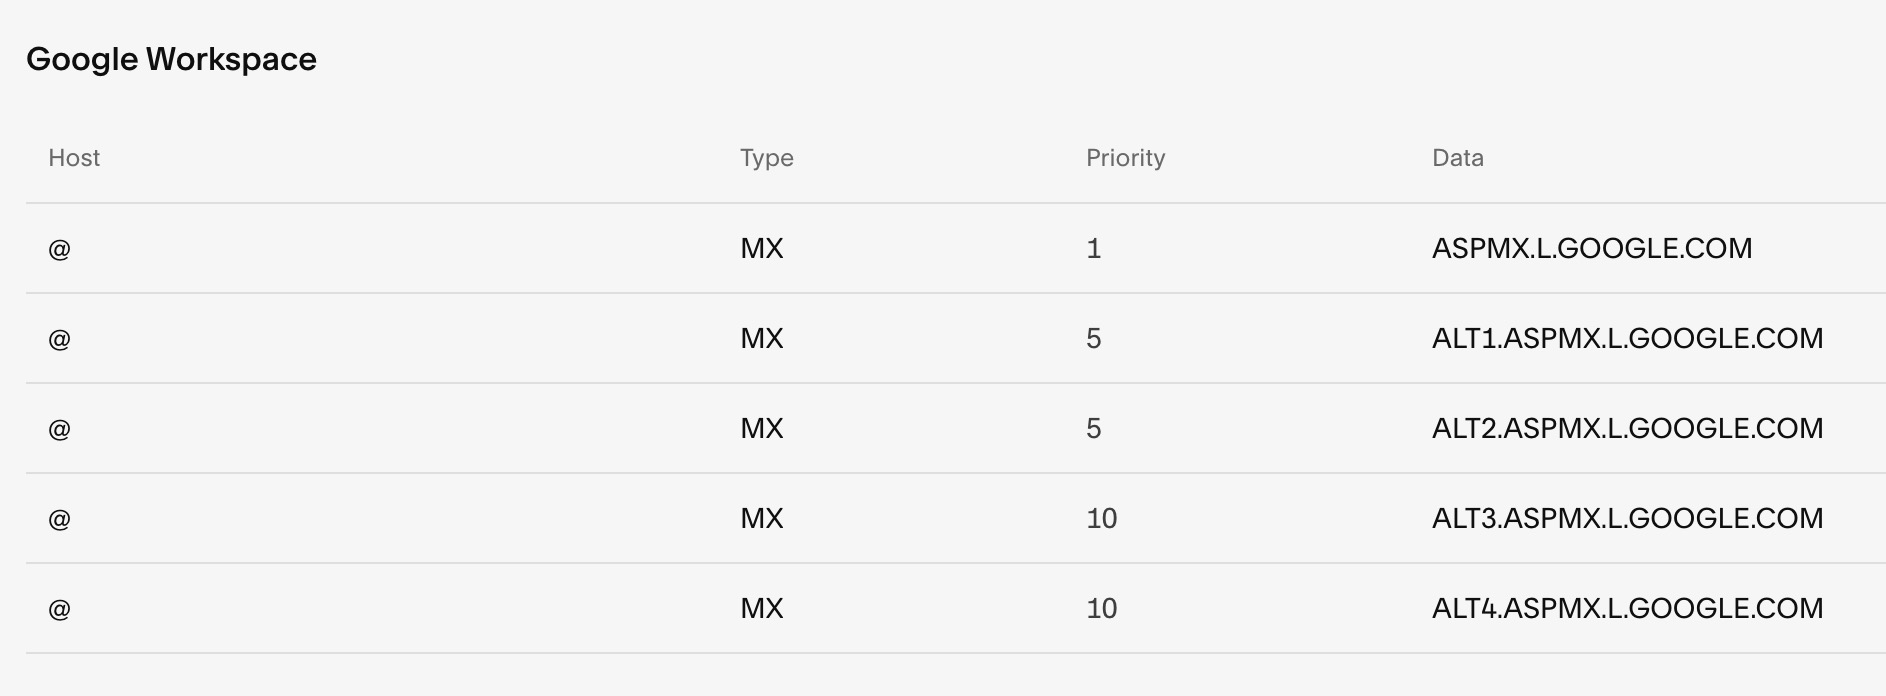
Example Google Workspace chart

Squarespace help chart with icons
Adding MX Records
For Squarespace Domains:
- Open DNS Settings
- Select "Google Workspace MX" from the predefined settings dropdown
- Records will be added automatically
For Third-Party Domains:
- Follow Google's documentation for your specific provider
- Add MX records through your domain provider's DNS settings
For Subdomains:
- Go to DNS settings
- Click "Add a Record"
- Enter subdomain name in Host field
- Select MX as Type
- Set Priority to 10
- Enter smtp.google.com in Data field
Important Notes:
- DNS changes can take up to 72 hours to process
- If email stops working after adding new records, remove all email-related records and re-add them
- For non-Squarespace domains or Google Workspace accounts, contact your provider directly
- If issues persist after 72 hours, contact support
Troubleshooting Tips:
- Verify domain connection
- Check subscription status
- Review spam settings
- Ensure correct record configuration
Remember: Having duplicate MX records can cause issues. Maintain either the five separate records or the single consolidated record, but not both.
Related Articles

Why Domain Changes Take Up to 48 Hours to Propagate Worldwide
