Acuity Scheduling Block: How to Add and Customize Booking Pages
Let visitors seamlessly book appointments directly on your website with the Acuity Scheduling block. This guide covers setup for both Squarespace-integrated and standalone Acuity accounts.
Adding the Block with Squarespace Integration:
- Edit your page
- Click [Add Block] or the insertion point
- Select [Scheduling]
- Click the pencil icon
- Choose your preferred scheduler display option
- Click [Apply] (Version 7.0)
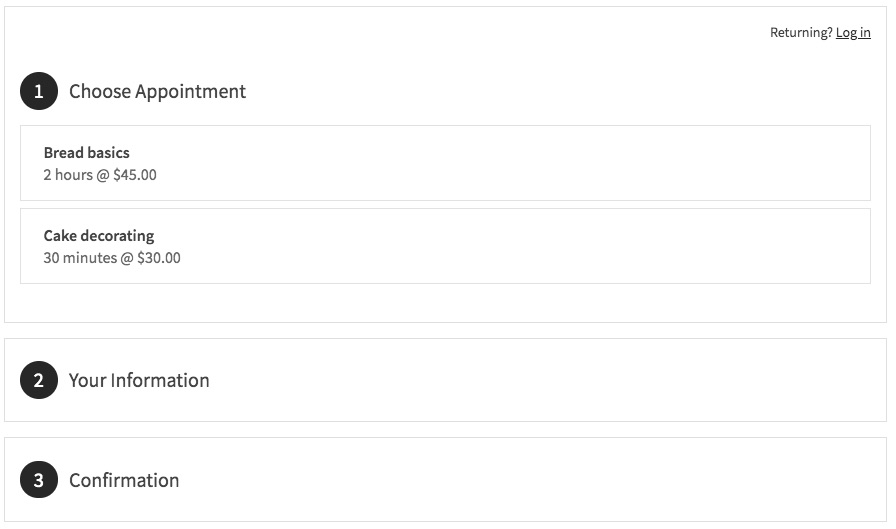
Booking screen: showing three options
Using Standalone Acuity:
- Get your scheduler URL from Acuity's "Link to Booking Page"
- Add Acuity Scheduling block to your page
- Click the pencil icon
- Select [Custom Link]
- Paste your Acuity URL
- Click [Apply] (Version 7.0)
Editing Existing Blocks:
- Edit the page
- Click the block
- Click the pencil icon
- Make changes
- Click [Save]
Security Options:
- Add page password protection
- Create member-only access
- Gate content through membership sites
Customization:
- Access "Customize Appearance" in Acuity
- Click "Booking Page Options"
- Adjust settings using preview panel
- Save changes
Important Notes:
- No Squarespace transaction fees
- Paid Acuity plan required for standalone embedding
- All Squarespace-integrated Acuity plans support embedding
- "Powered by Acuity" text can be hidden in appearance settings
Related Articles
URL Deep Links: Full Guide for Squarespace 7.0 Gallery Sharing