How to Add a Scheduling Block and Integrate Acuity Calendar on Your Website
A scheduling block lets visitors book appointments directly on your website through Acuity's scheduling interface. This feature requires an Acuity account, which you can get either through Squarespace or as a standalone service.
Adding a Scheduling Block with Squarespace-linked Acuity:
- Edit your page
- Click Add Block or an insertion point
- Select "Scheduling"
- Click the pencil icon to open block editor
- Choose your preferred scheduling display option
- Click Apply (for version 7.0)
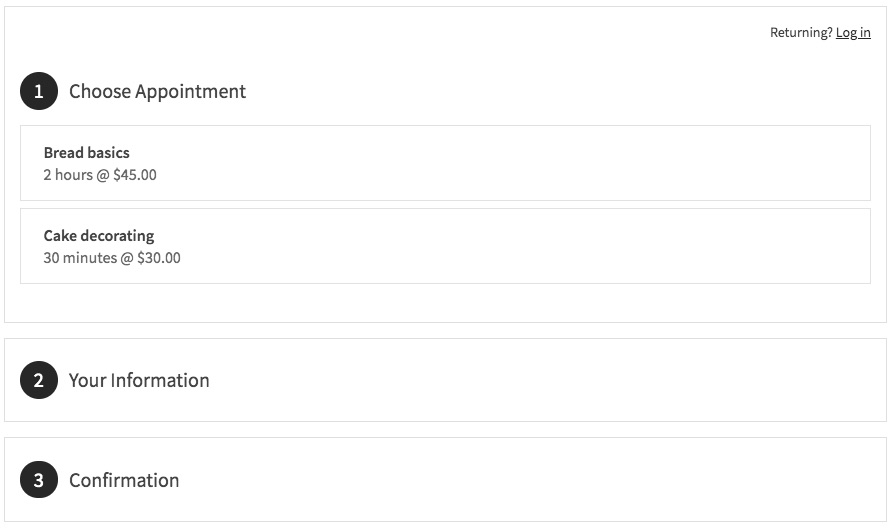
Options for decorating sweets and bread
Using Standalone Acuity:
- Copy your Acuity scheduling page URL
- Add a Scheduling Block to your page
- Select "Custom Link" from the dropdown
- Paste your Acuity URL
- Click Apply
Customizing Your Scheduling Block:
- Edit appearance through Acuity's "Customize Appearance" menu
- Modify scheduling page options
- Hide "Powered by Acuity" branding if desired
- Preview changes in real-time
Security Options:
- Add page password protection to limit access
- Restrict to site members using Member Sites feature
- Control visibility through content restrictions
Important Notes:
- No Squarespace transaction fees apply
- Free Acuity plans don't support embedded calendars (standalone only)
- All Squarespace-integrated Acuity plans support scheduling blocks
- Design can be customized to match your site's aesthetics
- Changes can be made anytime through the block editor
For enhanced security, consider using page passwords or member-only access to control who can book appointments through your scheduling block.
Related Articles

How to Link Squarespace Domain to Google Sites: Complete Guide