

Add Google Workspace MX Records to Your Domain: A Complete Guide
Configure Google Workspace MX Records correctly to enable email functionality for your domain.
Check Existing MX Records:
- Navigate to your domain dashboard
- Select your Squarespace domain
- Click DNS settings
- Look for Google Workspace DNS records
Your records should match one of these formats:
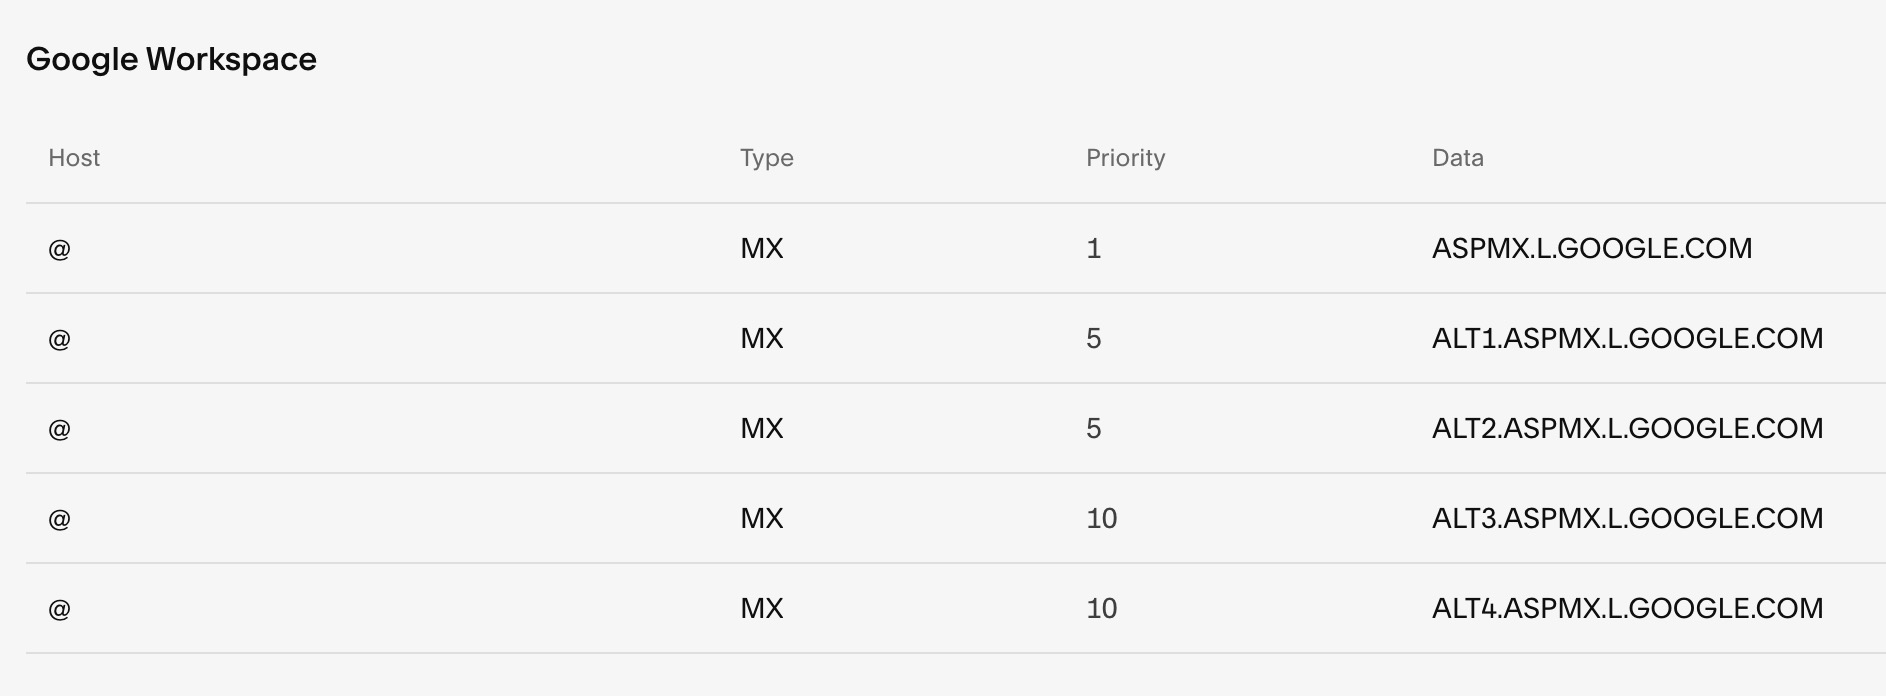
Table Header: Host, Type, Priority, Data
Or a single consolidated entry:

Google DNS settings in Domain Manager
Add Missing MX Records:
For Squarespace Managed Domains:
- Use the "Add Default" dropdown menu
- Select "Google Workspace MX" option
- This automatically adds all required entries
For Third-Party Domains:
- Follow Google's documentation for your specific provider
- Add MX records through your domain provider's DNS settings
For Sub-Domains:
- Go to DNS settings
- Click "Add Record" under Custom Records
- Enter sub-domain in Host field
- Select MX as Type
- Set Priority to 10
- Enter smtp.google.com in Data field
Important Notes:
- Wait up to 72 hours for MX records to process
- Remove all existing MX records before adding new ones if experiencing issues
- Ensure you have an active Google Workspace subscription
- Contact Google support for account-specific issues
If emails aren't working after 72 hours, verify your domain connection and check for any spam-related issues.
Related Articles

Why Domain Changes Take Up to 48 Hours to Propagate Worldwide
