
How to Connect a Domain to Squarespace: Nameserver vs DNS Setup
Nameserver connect and DNS connect are two methods to connect a third-party domain to your Squarespace site. Understanding their differences helps you choose the right option for your needs.
When to Use Nameserver Connect:
- Best for GoDaddy, Namecheap, or Network Solutions domains
- Simple domain setups without custom DNS records
- No subdomains or DNSSEC
- No complex configurations like glue records or domain forwarding
- No third-party services requiring specific nameservers (like Cloudflare or AWS)
When to Use DNS Connect:
- Domains from other providers
- Custom DNS records needed
- Multiple subdomains
- DNSSEC enabled
- Complex domain registration setup
- Security or traffic services that require specific nameservers
Key Differences:
- DNS Record Storage:
- Nameserver Connect: DNS records stored at Squarespace
- DNS Connect: DNS records stored with third-party provider
- Setup Process:
- Nameserver Connect: Guided process, requires adding two nameserver records
- DNS Connect: Manual setup, requires adding two CNAME records and four A records
- Editing DNS Records:
- Nameserver Connect: Edit directly in Squarespace domains dashboard
- DNS Connect: Edit through domain provider's account
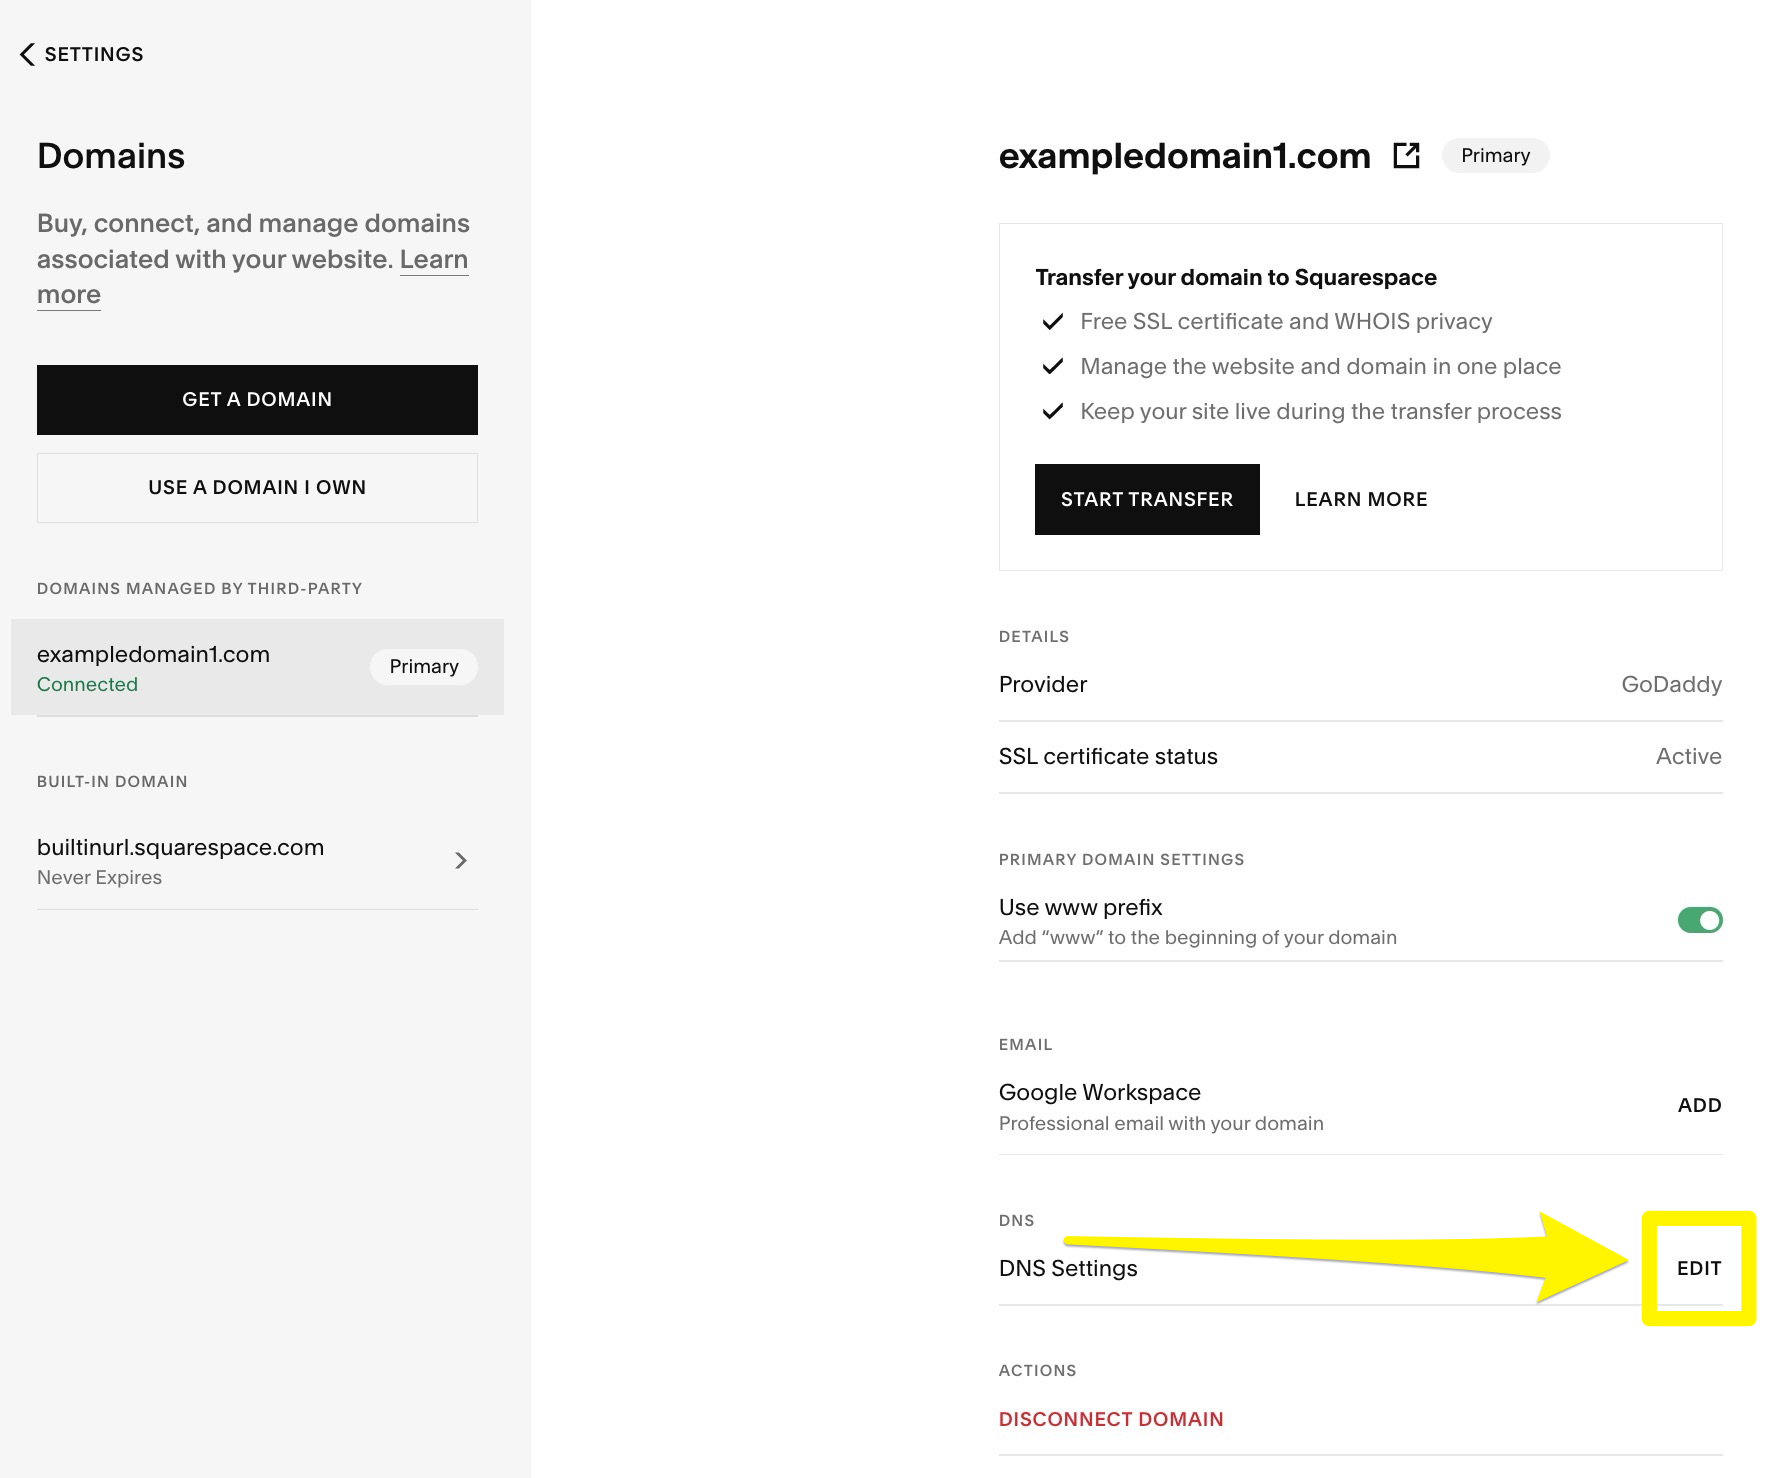
DNS settings screen in Squarespace
Opting Out of Nameserver Connect:
- Open Domains panel
- Click "Use a domain I own"
- Enter domain name
- Click "Connect domain"
- Select "No, use DNS records"
- Choose domain provider
- Sign in to provider account
- Complete connection process
Important Note: If you have custom features like email addresses or ad blockers using custom DNS records, use DNS connect to prevent service disruption.
To check your current connection method, visit your Domains panel, which displays whether you're using DNS connect or nameserver connect.
Related Articles

Why Domain Changes Take Up to 48 Hours to Propagate Worldwide
