
How to Transfer a 1&1 IONOS Domain to Squarespace: Complete Guide
Transfer your 1&1 IONOS domain to Squarespace in 12 simple steps to manage all your domain settings in one place.
Before starting, review:
- Pricing and billing details
- Domain transfer requirements
- Transfer timing
- Steps for moving custom email addresses
Step 1: Access IONOS Account
- Visit 1&1 IONOS and sign in
- Navigate to Domains & SSL
- Select your domain
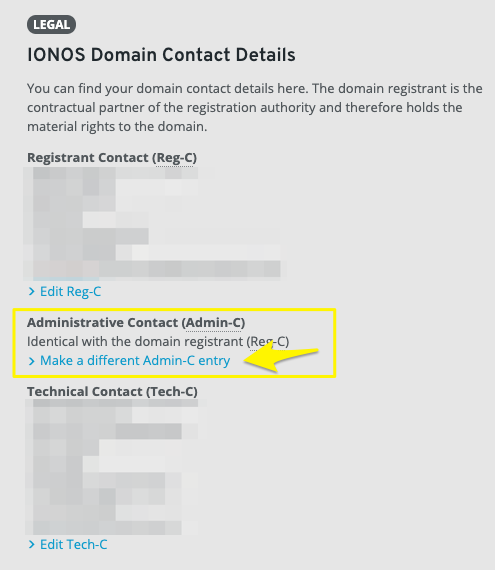
Step 2: Verify Contact Information
- Go to Privacy & Contact Details
- Check Administrative Contact details
- Edit if needed under Domain Contact Details
image
Step 3: Unlock Domain
- Select Renewal & Transfer tab
- Ensure domain transfer lock toggle is gray (unlocked)
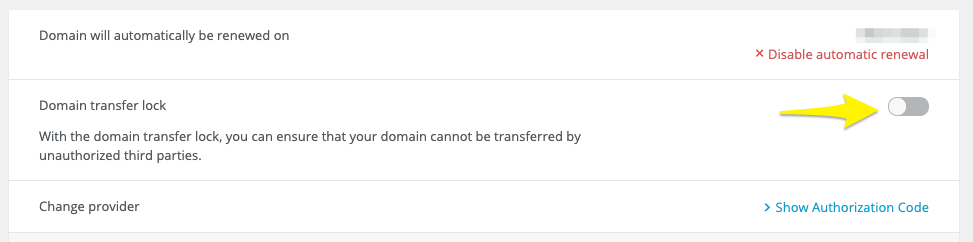
Domain auto-renewal toggle off
Step 4: Get Authorization Code
- Click "Show Authorization Code" in Change provider section
- Copy and save the code
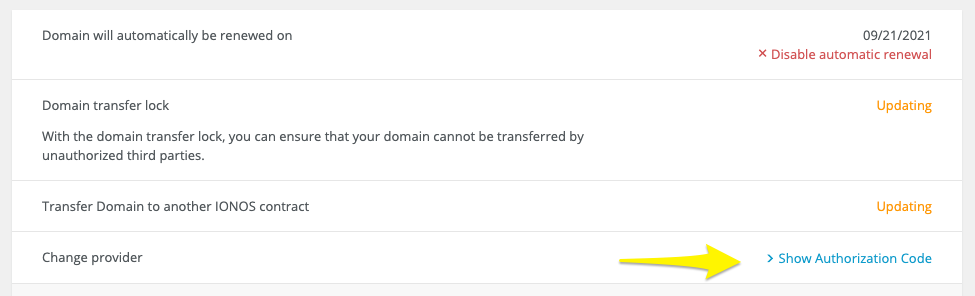
Yellow right-pointing arrow
Step 5: Initiate Transfer
- Open Squarespace Domains panel
- Click "Use a domain I own"
- Enter domain name
- Click Transfer domain
- Enter authorization code
Step 6: Confirm Registration Details
- Verify contact information
- Update email address if needed
- Make necessary changes to WHOIS records
Step 7: Review Payment
- Confirm payment method
- Enter new credit card if needed
Step 8: Finalize Order
- Review transfer details
- Check one-year registration charge
- Confirm terms and expiration date
- Complete purchase
Step 9: Accept Transfer Wait for IONOS email and approve transfer link
Step 10: Monitor Transfer Status
- Check Domains panel for progress
- Address any error messages
- Verify domain is unlocked
- Confirm authorization code if needed
Step 11: Review DNS Settings
- Check existing DNS records
- Remove unnecessary records
- Add new custom records if needed
- Preserve MX records for email
Step 12: Complete Transfer
- Wait for confirmation email
- Verify domain shows green label in panel
Post-Transfer Tasks:
- Cancel IONOS hosting if needed
- Set as primary domain
- Enable SSL
- Set up Google Workspace email
- Review domain invoice
Troubleshooting:
- Contact IONOS support for transfer issues
- Review transfer requirements
- Consider domain connection instead of transfer if problems persist
Related Articles

Why Domain Changes Take Up to 48 Hours to Propagate Worldwide
