Scheduling Block: Add Acuity Booking Calendar to Your Site
The Booking Block integrates Acuity Scheduling directly into your website, allowing visitors to make appointments without leaving your site. Here's everything you need to know about implementing and customizing it.
Adding a Booking Block for Squarespace-Linked Acuity:
- Click [Add Block] or the insertion point
- Select [Scheduling]
- Click the pencil icon to edit
- Choose your preferred scheduler type
- Click [Apply] (for version 7.0)
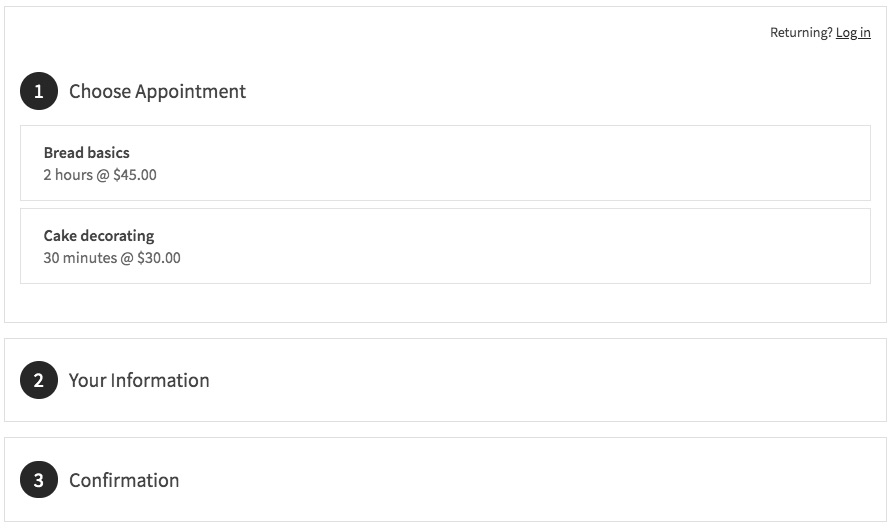
Booking screen: 3 options displayed
Adding a Standalone Acuity Booking Block:
- Get your scheduler URL from Acuity's "Link to Booking Page"
- Add a Booking Block to your page
- Select [Custom Link] from the drop-down
- Paste your Acuity URL
- Click [Apply] (for version 7.0)
Customizing Your Booking Page:
- Access "Customize Appearance" in Acuity
- Click "Booking Page Options"
- Adjust settings using the live preview
- Save your changes
Security Options:
- Add a page password to restrict access
- Place the booking block in a members-only area
Important Notes:
- No Squarespace transaction fees apply
- Standalone Acuity requires a paid plan for embedding
- Squarespace-linked Acuity works with all plans
To Remove "Powered by Acuity":
- Go to "Customize Appearance"
- Select "Booking Page Options"
- Choose "Hide Powered By Acuity Scheduling"
- Save changes
Editing Existing Blocks:
- Edit the page containing the block
- Click the booking block
- Click the pencil icon
- Make your changes
- Save
Related Articles

How to Link Squarespace Domain to Google Sites: Complete Guide