Squarespace Acuity Scheduling Block: Complete Guide and Setup Instructions
Visitor scheduling is easy with Acuity appointment booking blocks. Here's how to set it up and customize it on your site.
Adding a Booking Block with Squarespace-Linked Acuity
- Edit your page/post
- Click Add Block or an insertion point
- Select Appointment Booking
- Click the pencil icon to edit
- Choose your preferred scheduler type
- Click Apply (Version 7.0)
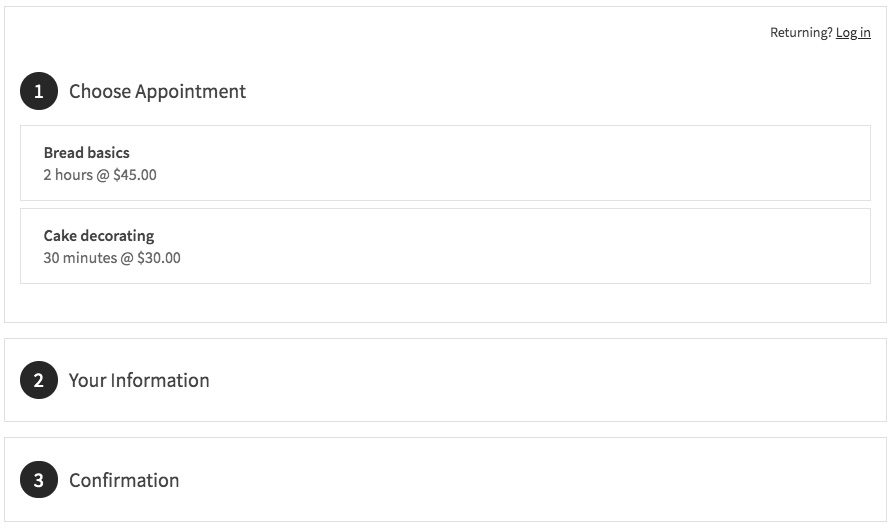
Screen of appointment types
Using Independent Acuity Scheduling
-
Copy your scheduler URL from Acuity:
- Go to Appointment Booking Page Link
- Copy the General Appointment Booking Page link
- Or use Direct Links for specific calendars/appointment types
-
Add to your site:
- Add Appointment Booking block
- Select Custom Link
- Paste your Acuity URL
- Click Apply
Customizing Your Booking Block
Access customization options in Acuity:
- Go to Customize Appearance
- Select Appointment Booking Page Options
- Adjust layout and design preferences
- Save changes
Security Options
- Add page password protection
- Restrict access to site members
- Use Member Areas for exclusive booking
Important Notes
- No Squarespace transaction fees apply
- Paid Acuity plan required for independent accounts
- "Powered by Acuity" text can be hidden
- All Squarespace-linked Acuity plans support booking blocks
Editing Existing Blocks
- Edit the page
- Click the booking block
- Open block editor
- Make changes
- Save
Related Articles

Maximize Your Website Revenue: A Complete Guide to Squarespace Monetization