How to Add MX Records for Google Workspace Email Setup
To ensure email works correctly with Google Workspace, you'll need to properly configure MX records for your domain. Here's how to do it:
Checking Existing MX Records (Squarespace Domain)
- Navigate to your domain dashboard
- Select your Squarespace domain
- Click DNS
- Look for Google Workspace DNS records
You should see either:
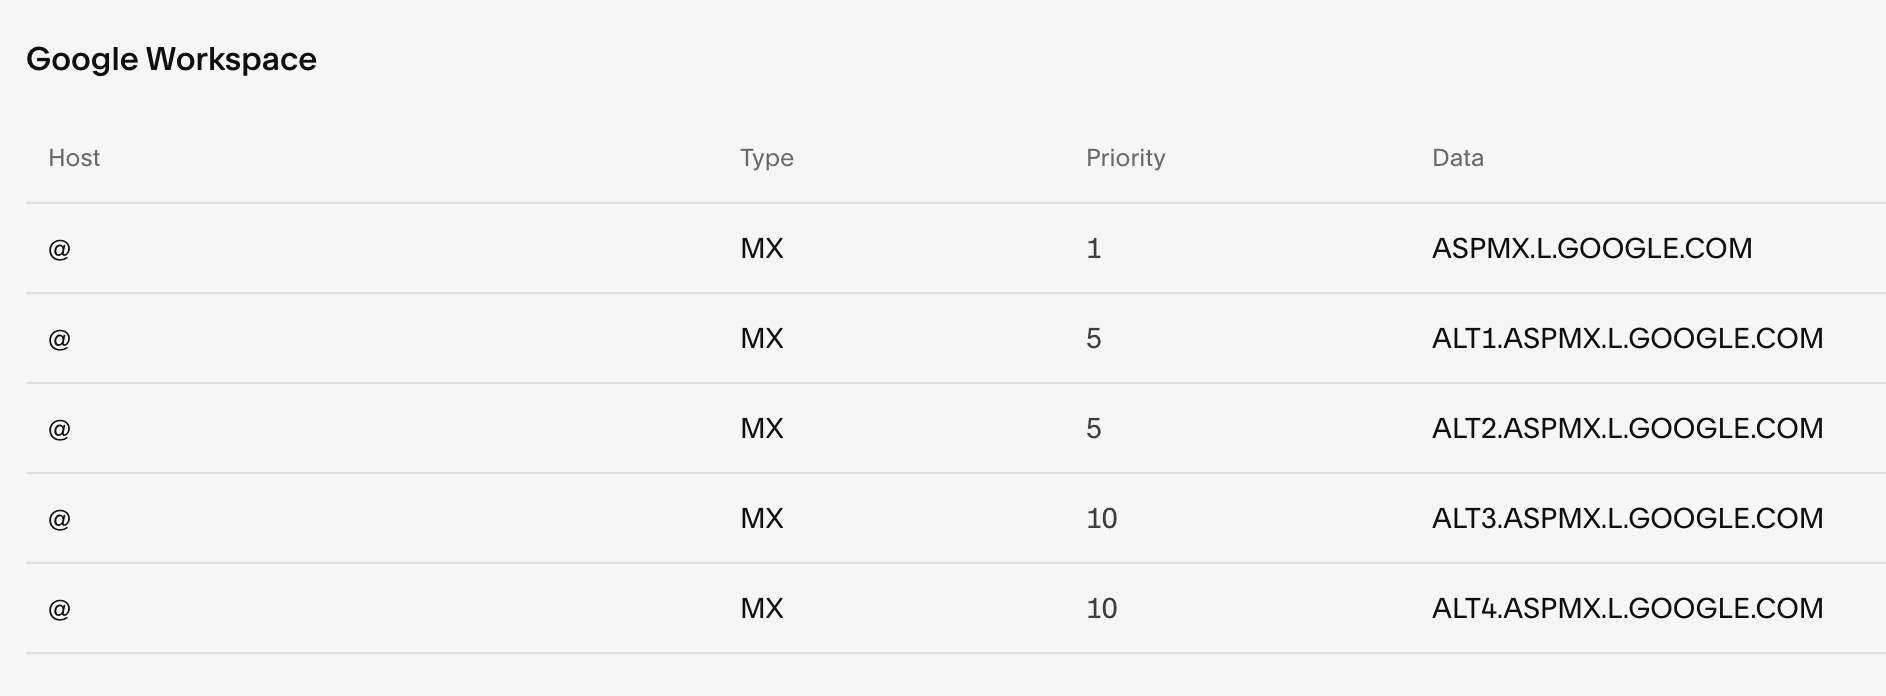
List of priority data
Or:

Priority and data table of Google records
Adding MX Records
For Squarespace Domains:
- Go to DNS Settings
- Click Add Preset
- Select Google Workspace
- Wait for automatic configuration
For Third-Party Domains:
- Add MX records through your domain provider's DNS settings
- Follow Google's documentation for provider-specific instructions
For Subdomains:
- Go to DNS settings
- Click Add Record under Custom Records
- Enter subdomain in Host field
- Select MX as Type
- Set Priority to "10"
- Enter "smtp.google.com" in Data field
Important Notes:
- DNS changes can take up to 72 hours to propagate
- If email stops working after adding new records, remove all MX records and re-add them
- For accounts not purchased through Squarespace, contact Google or your domain provider for support
Troubleshooting:
- Wait 72 hours for changes to take effect
- Verify all MX records are correctly configured
- Remove and re-add records if experiencing issues
- Contact support if problems persist after 72 hours
Related Articles

How to Add and Remove Nameserver Glue Records: A Complete Guide