
How to Connect Name.com Domain to Squarespace: DNS Setup Guide
Start by accessing your Squarespace Domains panel and clicking "Use your own domain." Enter your Name.com domain name and select "name.com" from the dropdown menu. Keep the DNS settings panel open for reference.
Log into your Name.com account and navigate to your domain's DNS management section:
- Go to "My Domains"
- Click your domain
- Select "Manage DNS Records"
Add the Squarespace DNS template:
- Click "View DNS Templates"
- Select "Squarespace.com" from the Preset DNS Templates dropdown
- Copy the verification code from Squarespace's DNS Settings
- Paste it into Name.com's "Verification Key" field
- Click "Update DNS Records"
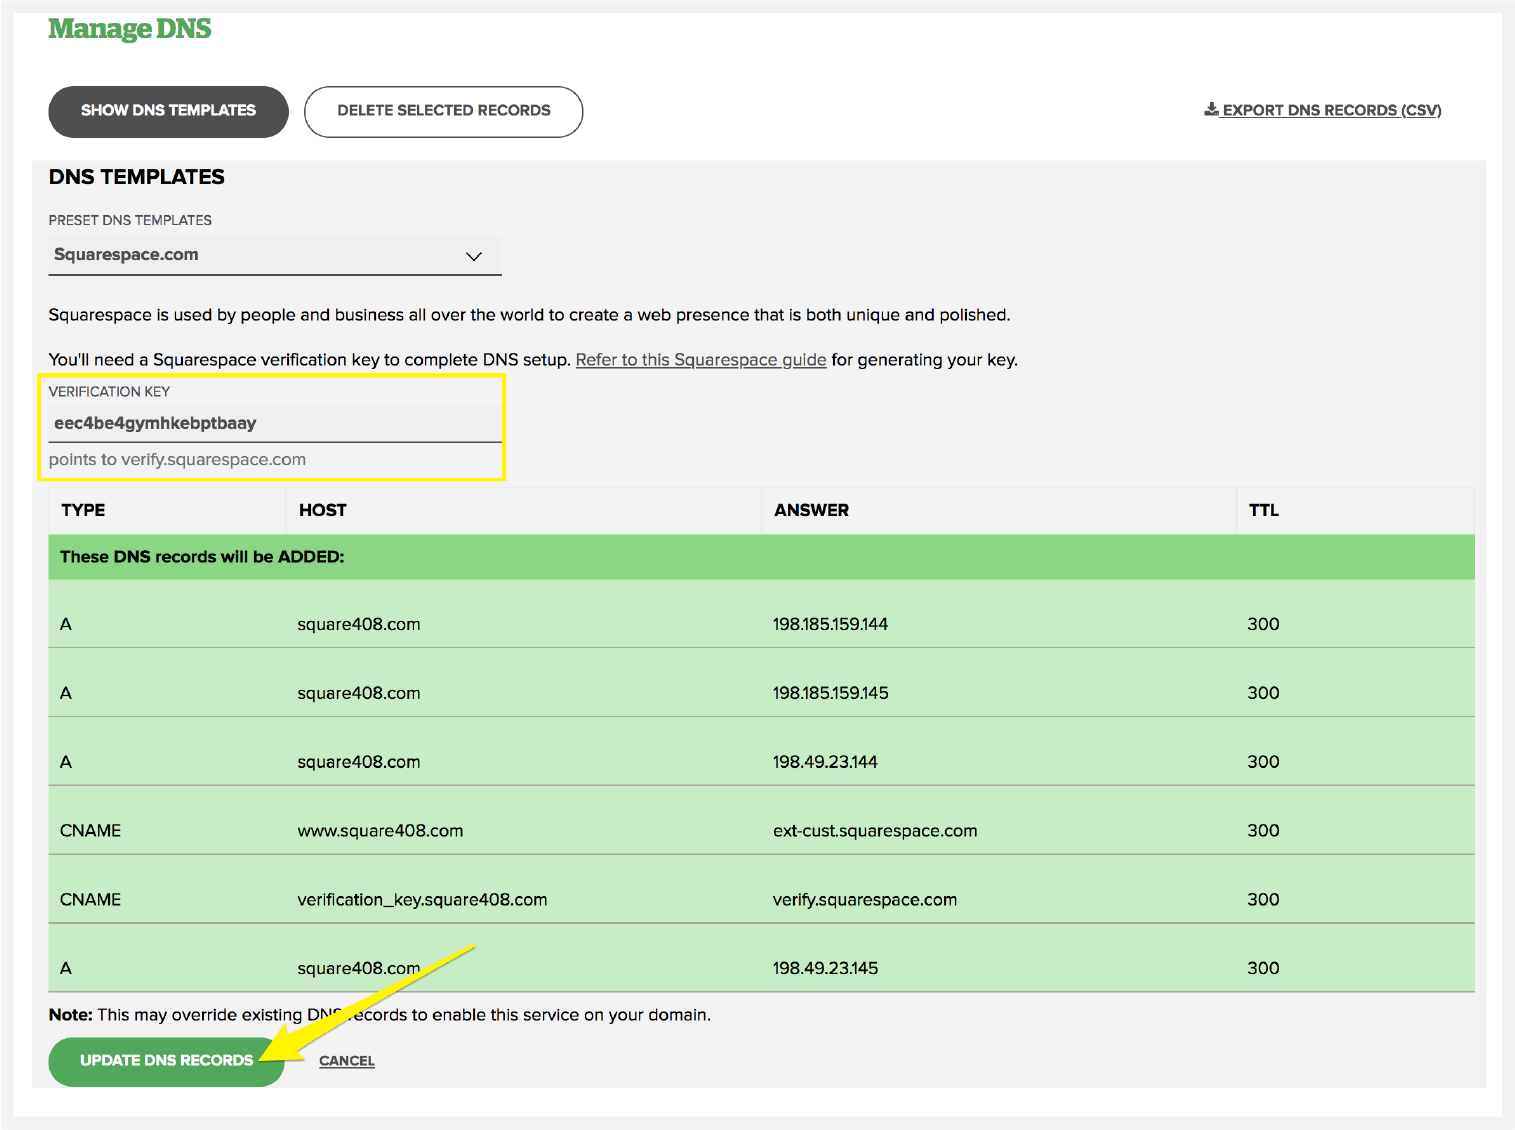
DNS Records Verification Table
Verify these six DNS records are present:
- Verification code (CNAME) → verify.squarespace.com
- www (CNAME) → ext-cust.squarespace.com
- @ (A) → 198.185.159.144
- @ (A) → 198.185.159.145
- @ (A) → 198.49.23.144
- @ (A) → 198.49.23.145
Wait 24-72 hours for the connection to complete. You can check progress in Squarespace's DNS Settings by clicking "Refresh Records" - a green label will appear when connected.
Troubleshooting:
- Use the DNS checker tool in DNS Settings if you see "Unable to verify domain ownership"
- Contact Name.com support for account-specific issues
- Temporary errors are normal during the first 72 hours
- Consult Squarespace's domain connection guides for additional help
Related Articles

Why Domain Changes Take Up to 48 Hours to Propagate Worldwide
